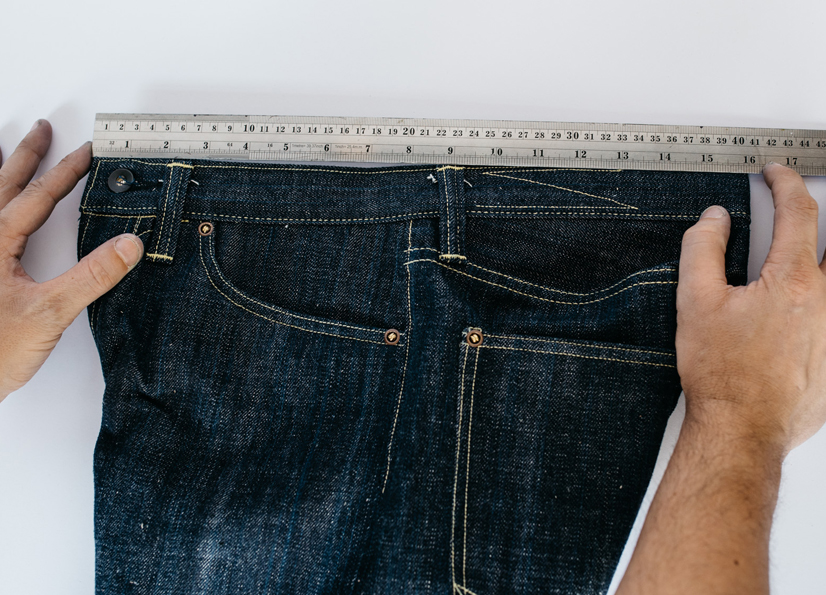
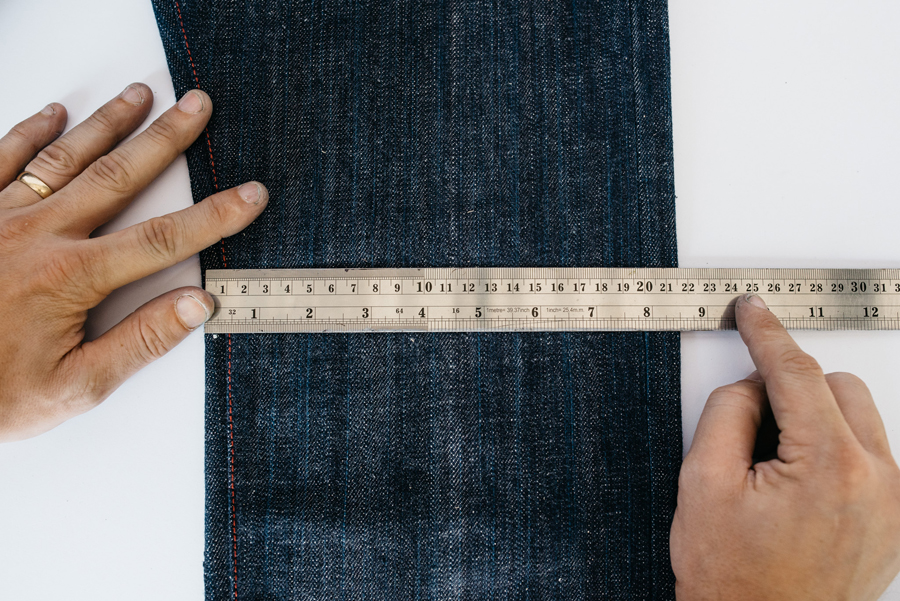
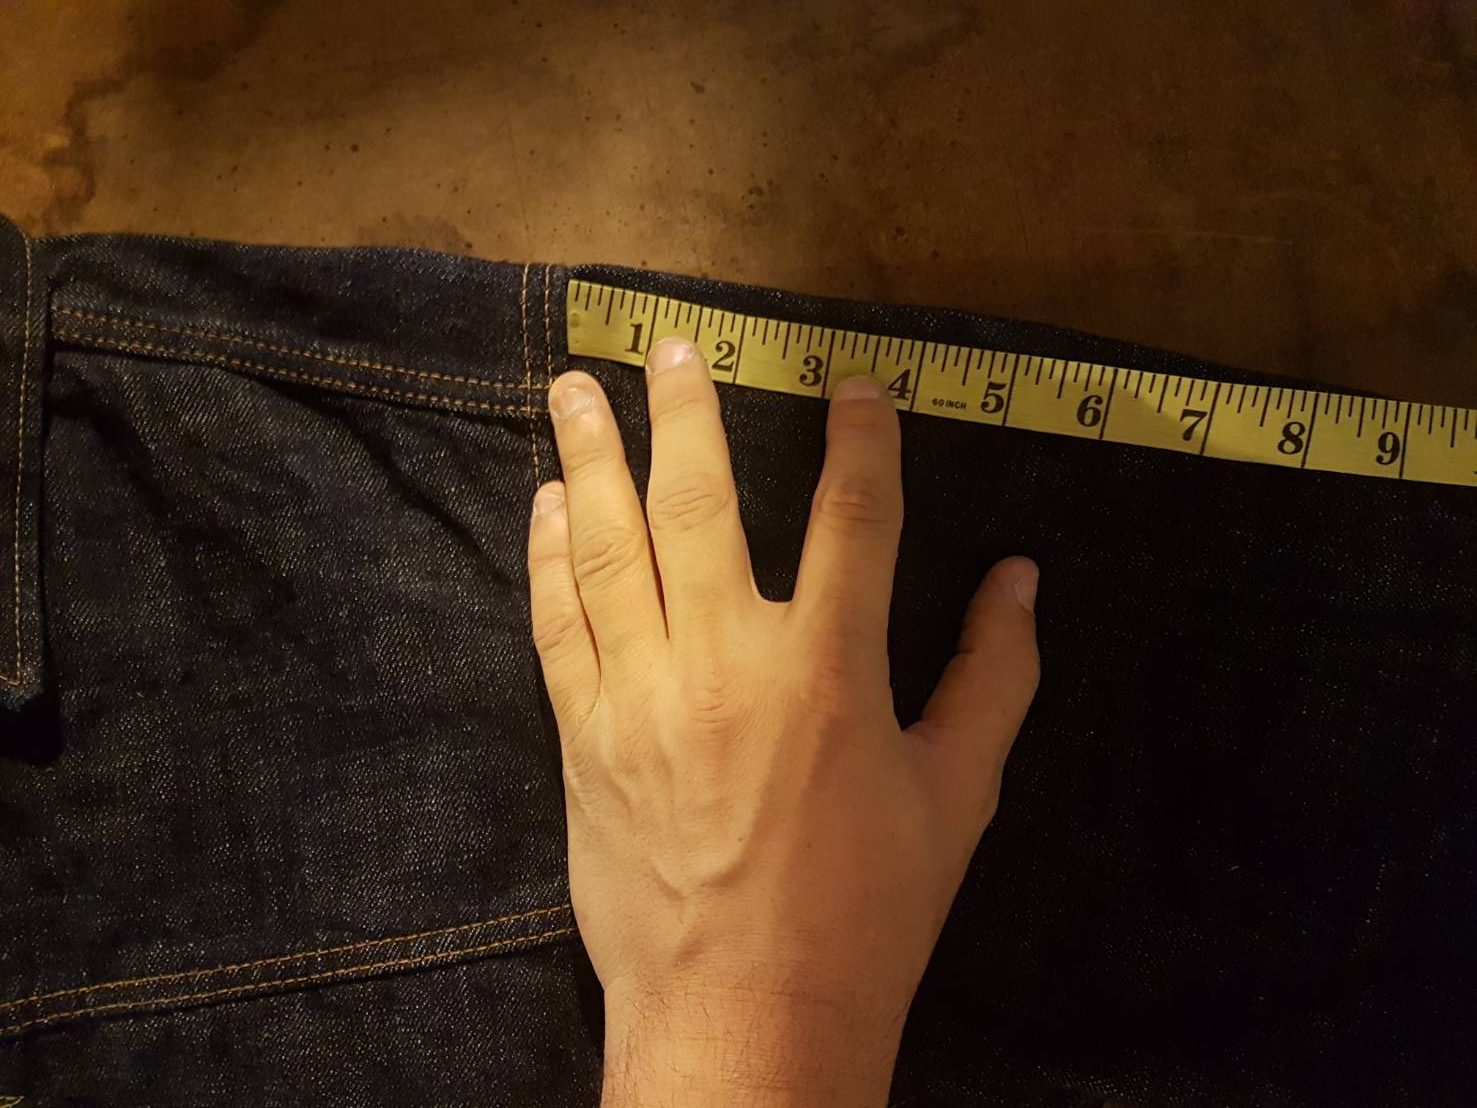
1. The Waist Band
To measure the “true waist” of your jeans, you should first, do up the top button and fold your jeans in half.
I fold the jeans in half with the button at the left side (like the picture) because it gives you more of a straight line to work with while measuring.
Now that you have a measurement, take that number and multiply it by 2.
My picture here shows a 32″ waist line.
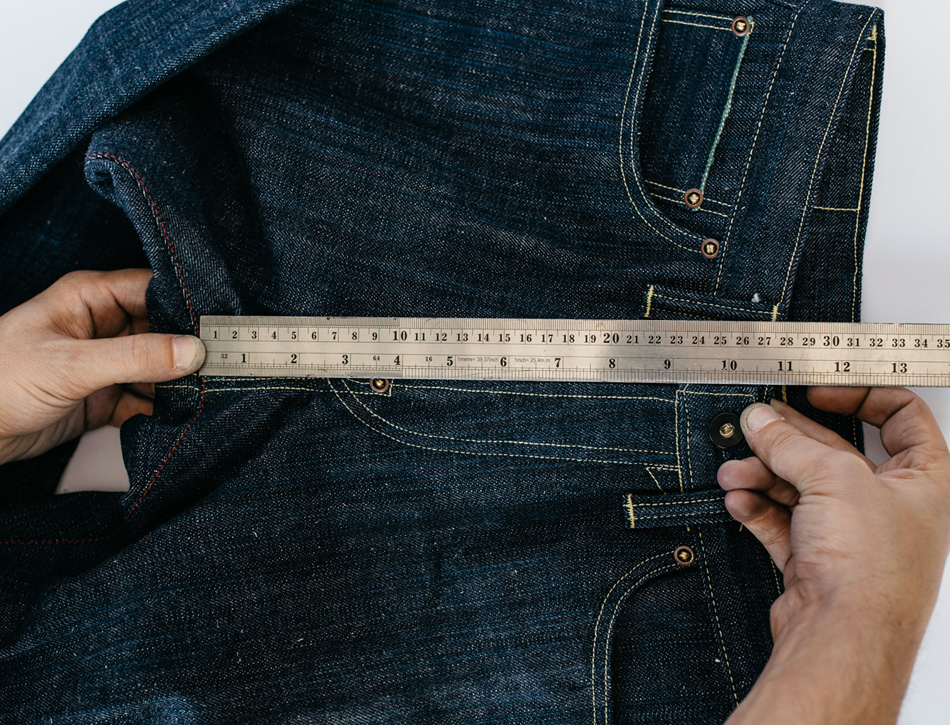
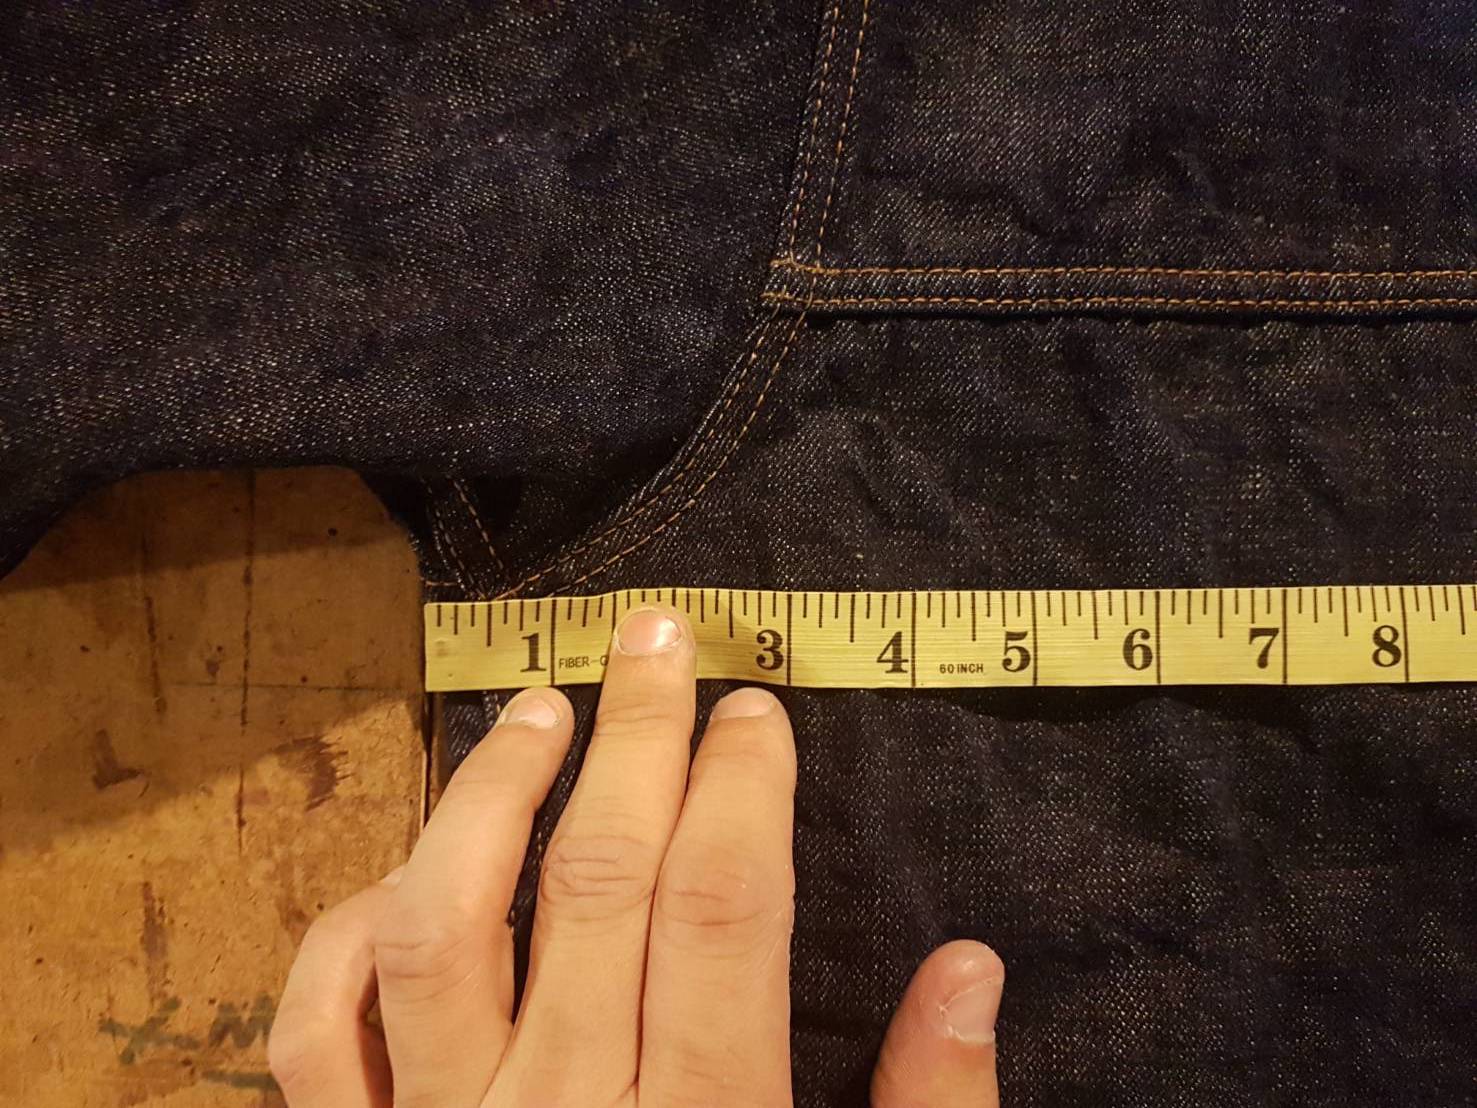
2. The Front Rise
The front rise is the distance from the inseam to the top of the waistband along the front fly.
If you have stretch denim, be careful that you don’t pull the denim out of its original shape.
The picture I posted has a 10.5″ front rise.
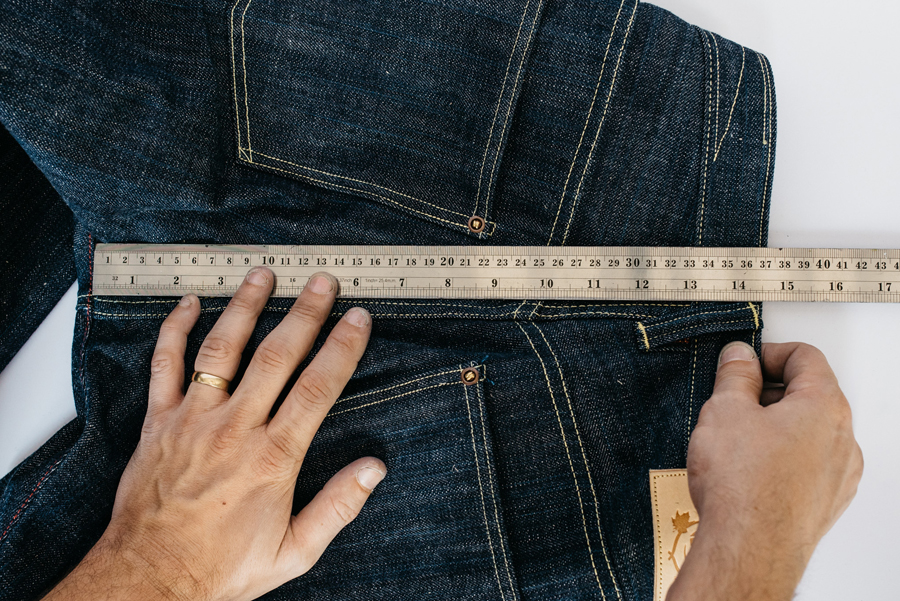
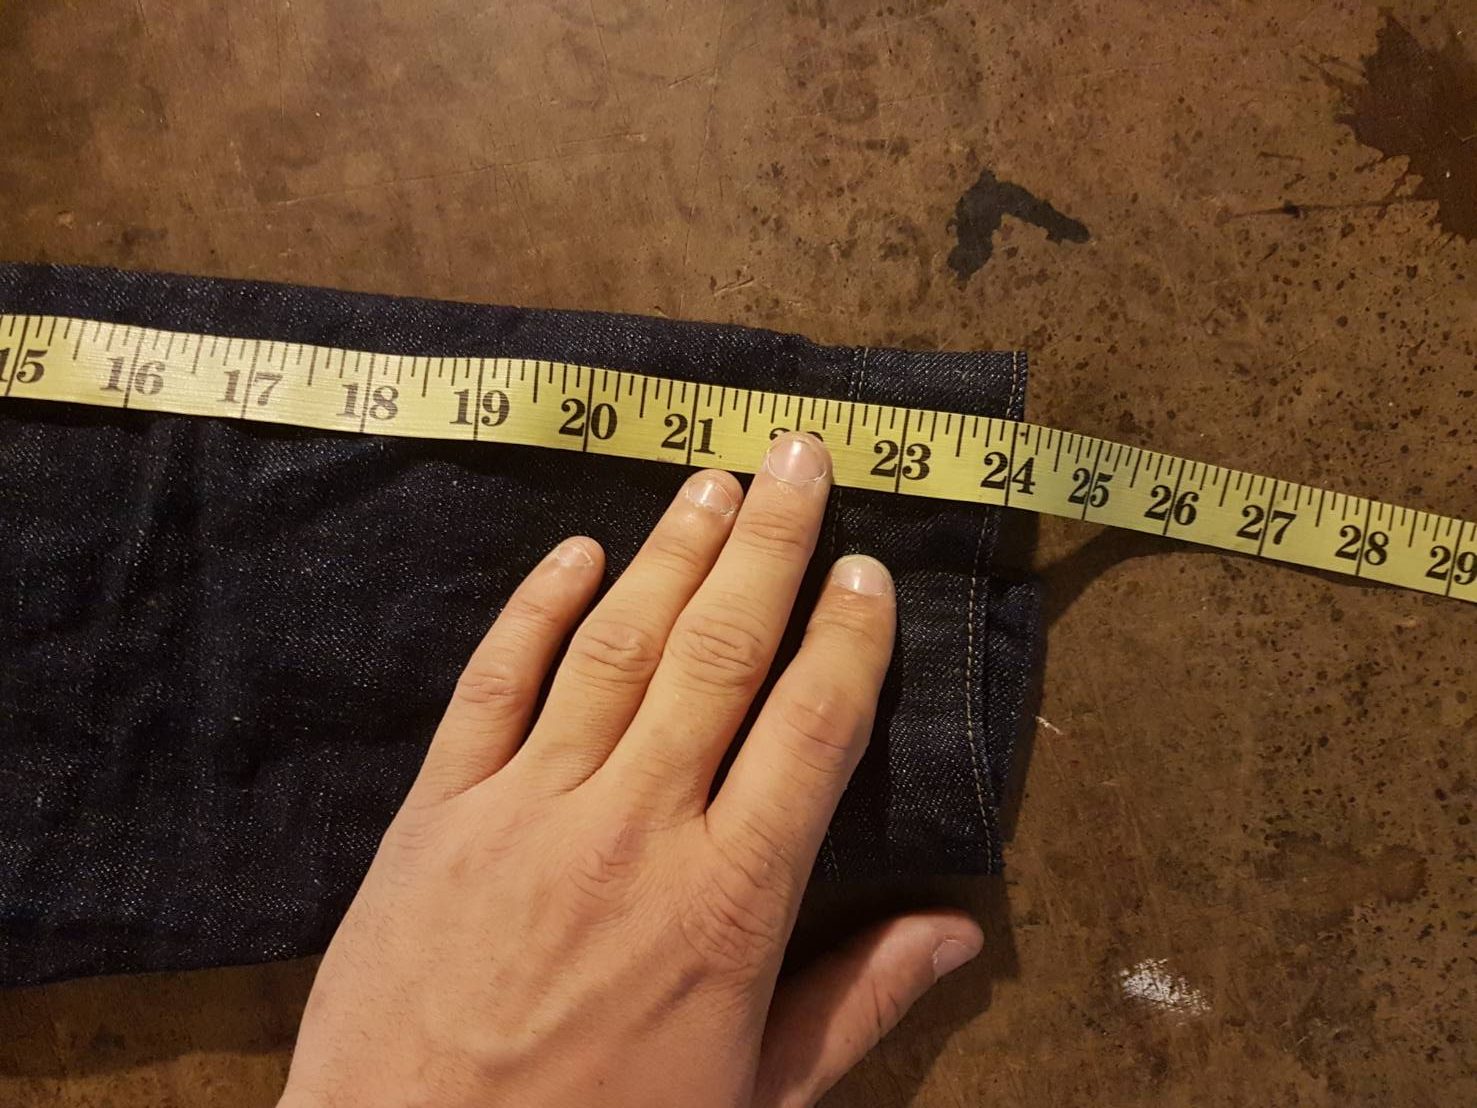
3. The Back Rise
With the same process from the front rise in mind, do the same for the back rise.
Again from the inseam to the top of the waist band, measure along the seam in the middle.
The jean in the picture has a 14.5″ back rise.
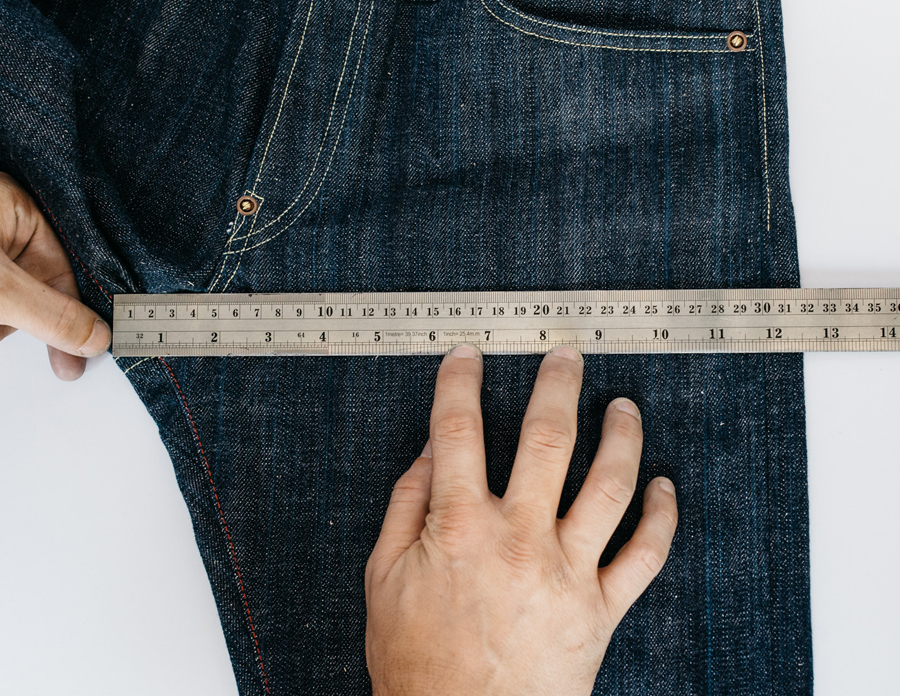
4. The Top Thigh
The top thigh is usually the one measurement that gives people the most difficulty.
But here is a good trick to getting an identical outcome. Lay your jeans out on a flat surface (not on your lap). Start the measuring tape at the corner of where the back rise shows, and measure straight across to the very edge of the jeans leg. This measurement is half of the circumference but it will be just fine for making a pattern.
The jean in the picture has a 12.5″ top thigh.
5. The Knee
Measuring the knee is similar to the top thigh in that you just have to have the jeans flat before you start measuring.
The knee measurement in the picture is 8.5″.
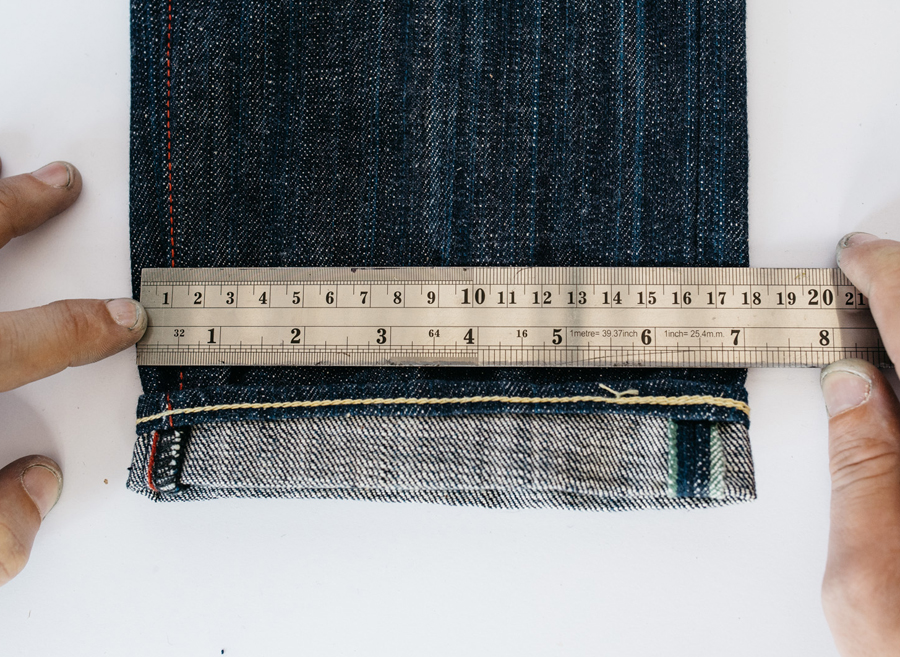
6. The Hem (Leg Opening)
Same as the knee. Keep the jeans flat and measure straight across.
The picture shows that the jean here has a leg opening of 7″.

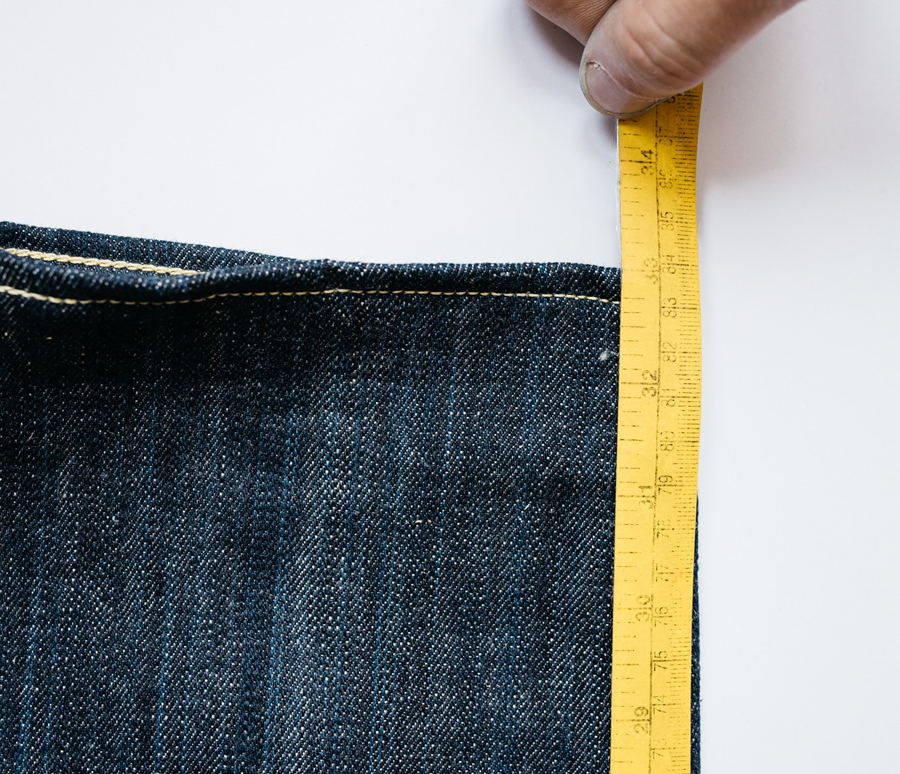
7. The Length
To measure the length, you should start with the measuring tape on the inseam right in the center of where the front and back rise meet. Measure straight down the inseam until you reach the hem. The first picture shows the length that you would need to measure. The second picture shows where you should finish measuring.
The jean that I am measuring is a 33″ inseam.
Now that you have your custom measurements, you are ready to order your pair! Click here to order.
HOW TO ACCURATELY MEASURE A JACKET
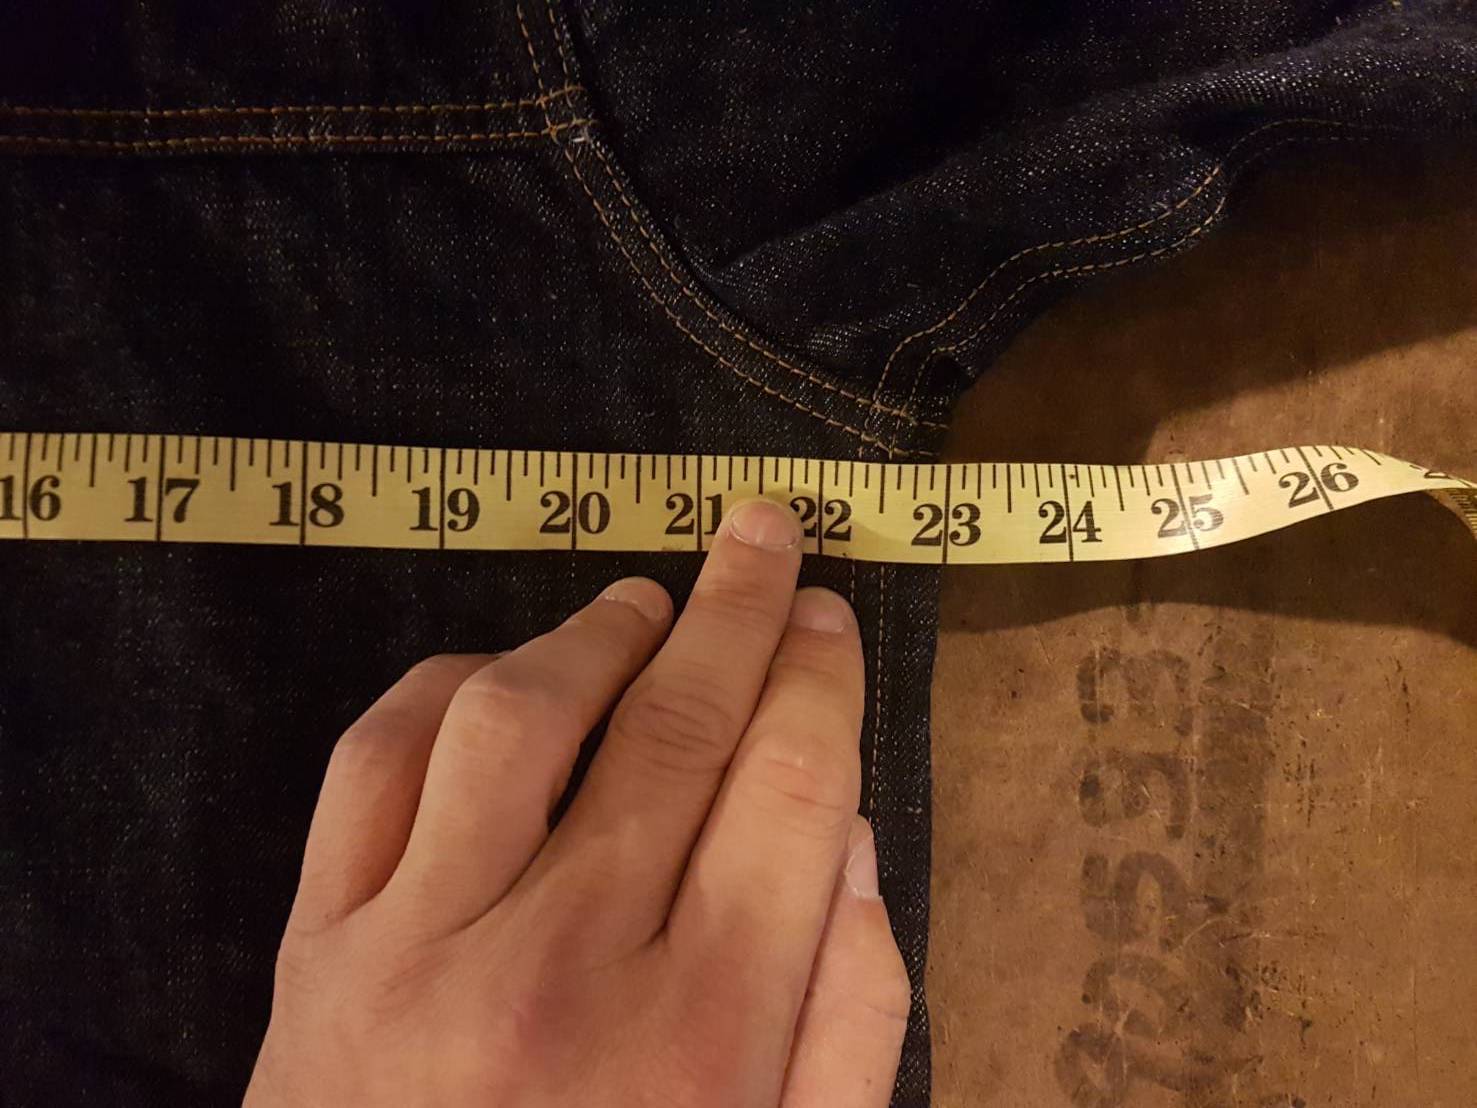
1. Chest Measurement
The chest measurement is taken horizontally from armpit to armpit and then multiplied by 2. Make sure the buttons are closed and the jacket isn’t bunched up on the backside. The jacket in the images measures 46″
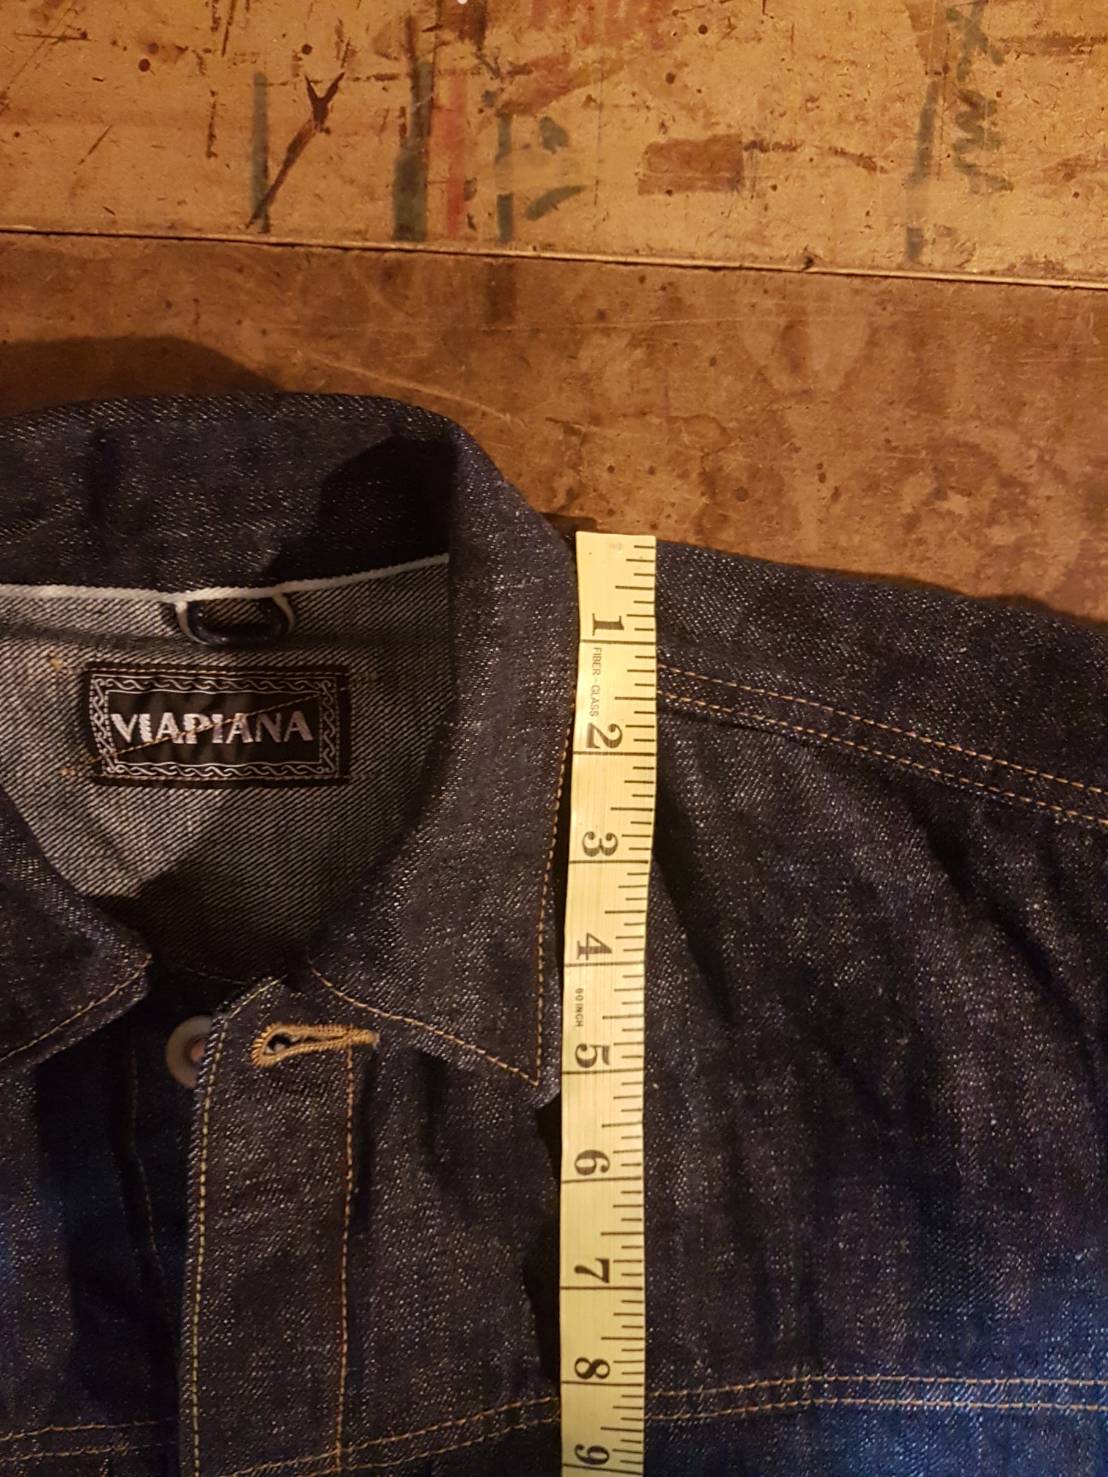
2. Length
The length of the jacket is measured beside the collar from the tallest point all the way down to the bottom most edge of the waistband. Keep the measuring tape as perpendicular to the bottom edge of the waistband as you can. The jacket in the photos shows a length of 26″.
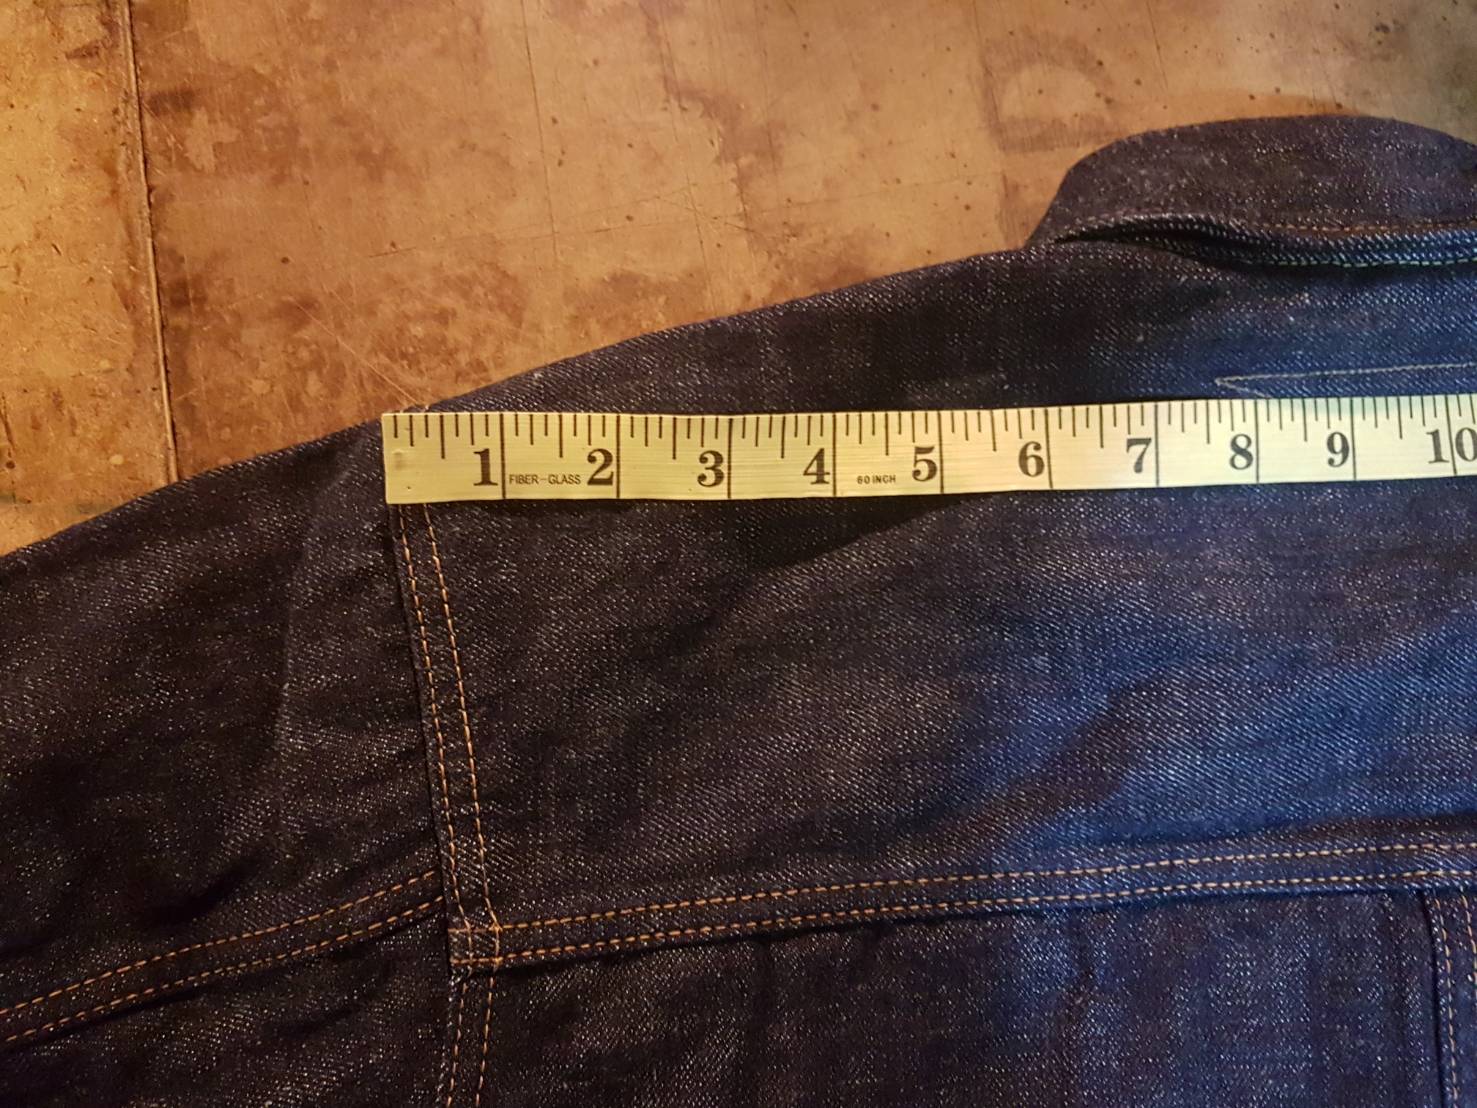
3. Sleeve
Measuring the sleeve requires the jacket to be laid flat on its back. start measuring from the top of the shoulder on the edge of the stitching,and all the way down to the furthest most edge of the cuff. (The cuff is included in the measurement). This measurement shows a sleeve that is 24″ long.

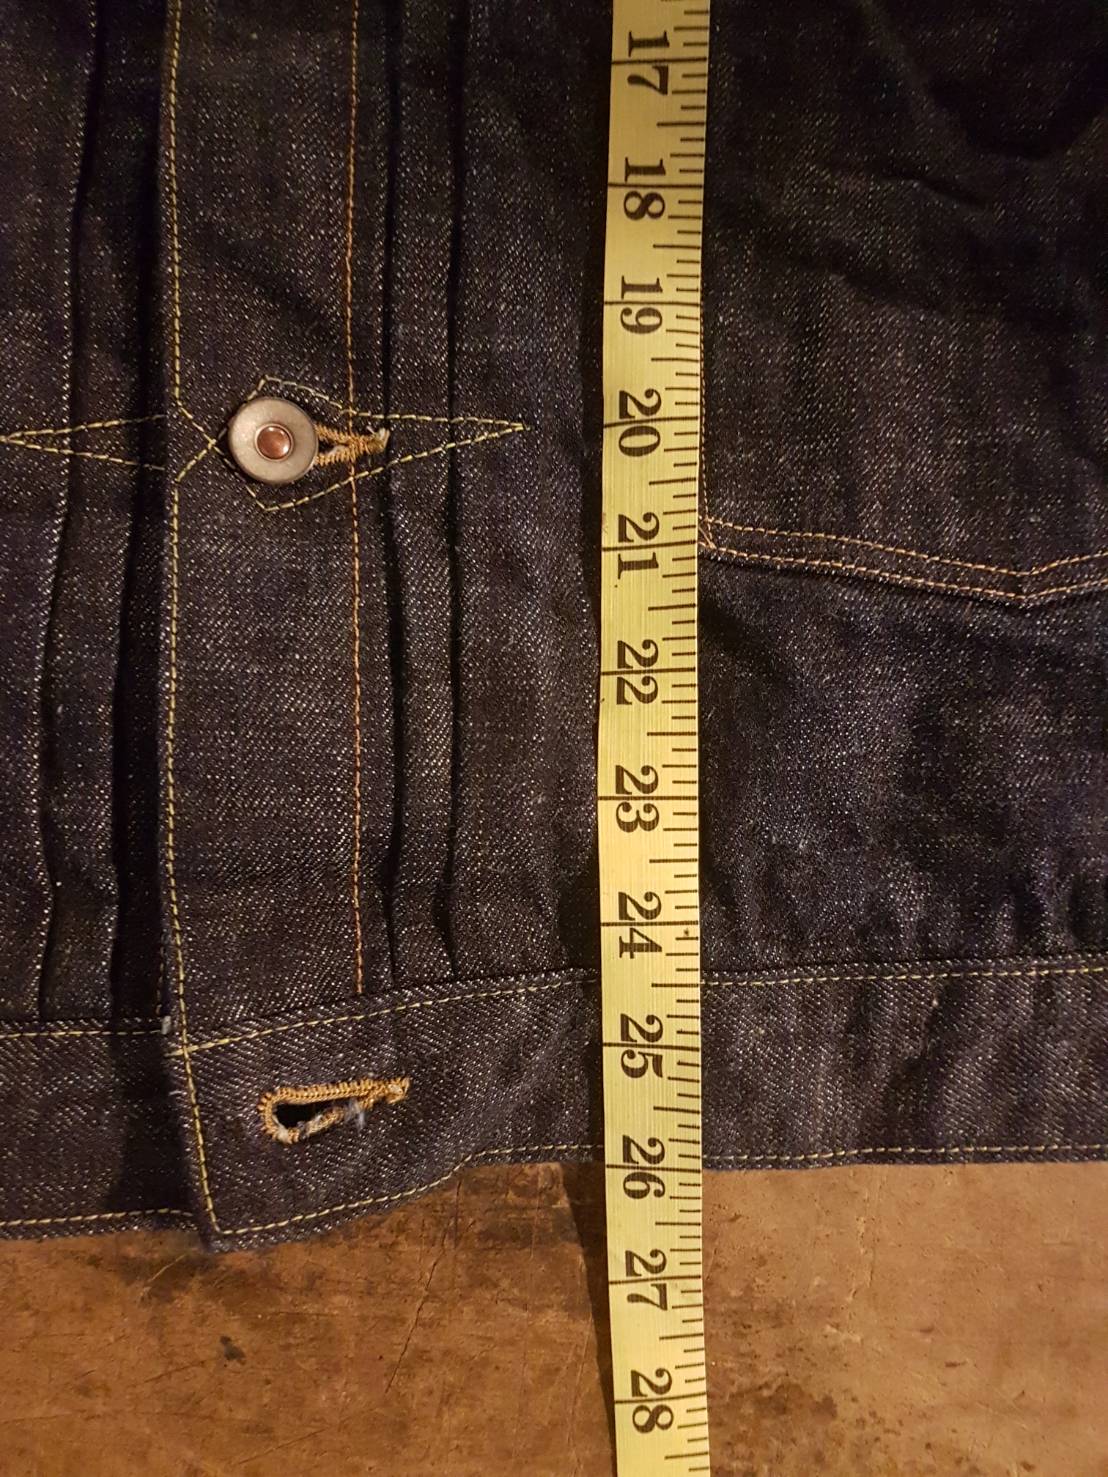
4. Shoulder
To measure the shoulder, flip the jacket over so it is face down. measure from the edge of stitching, across to the edge of the stitching on the other side at the top of the jacket. This shoulder measurement is 18″.